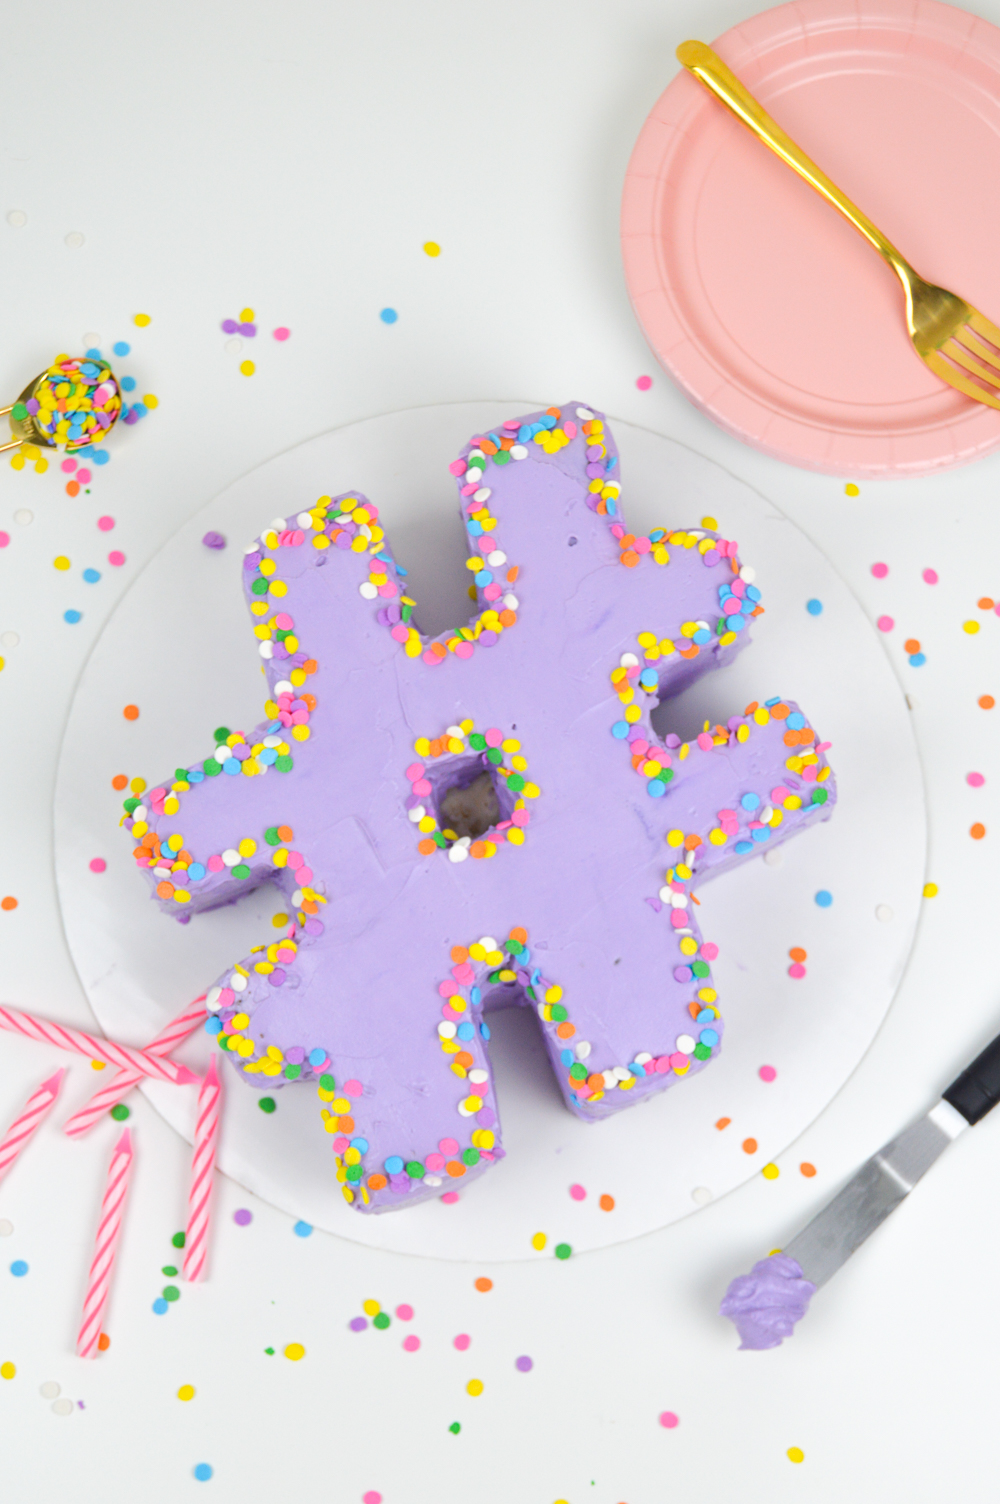
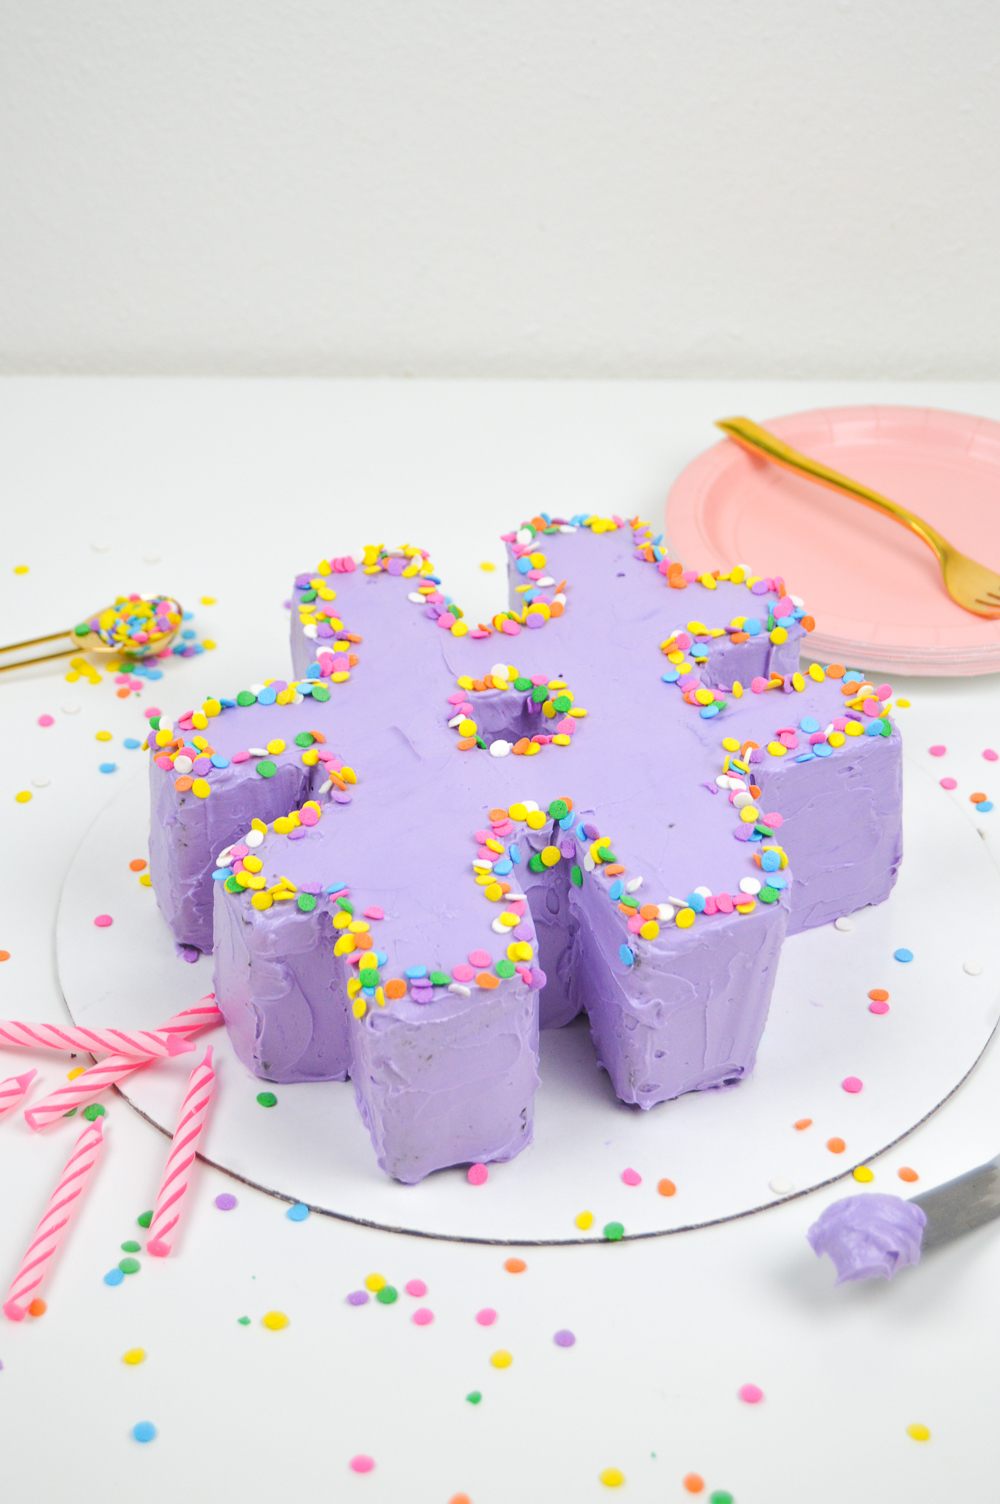
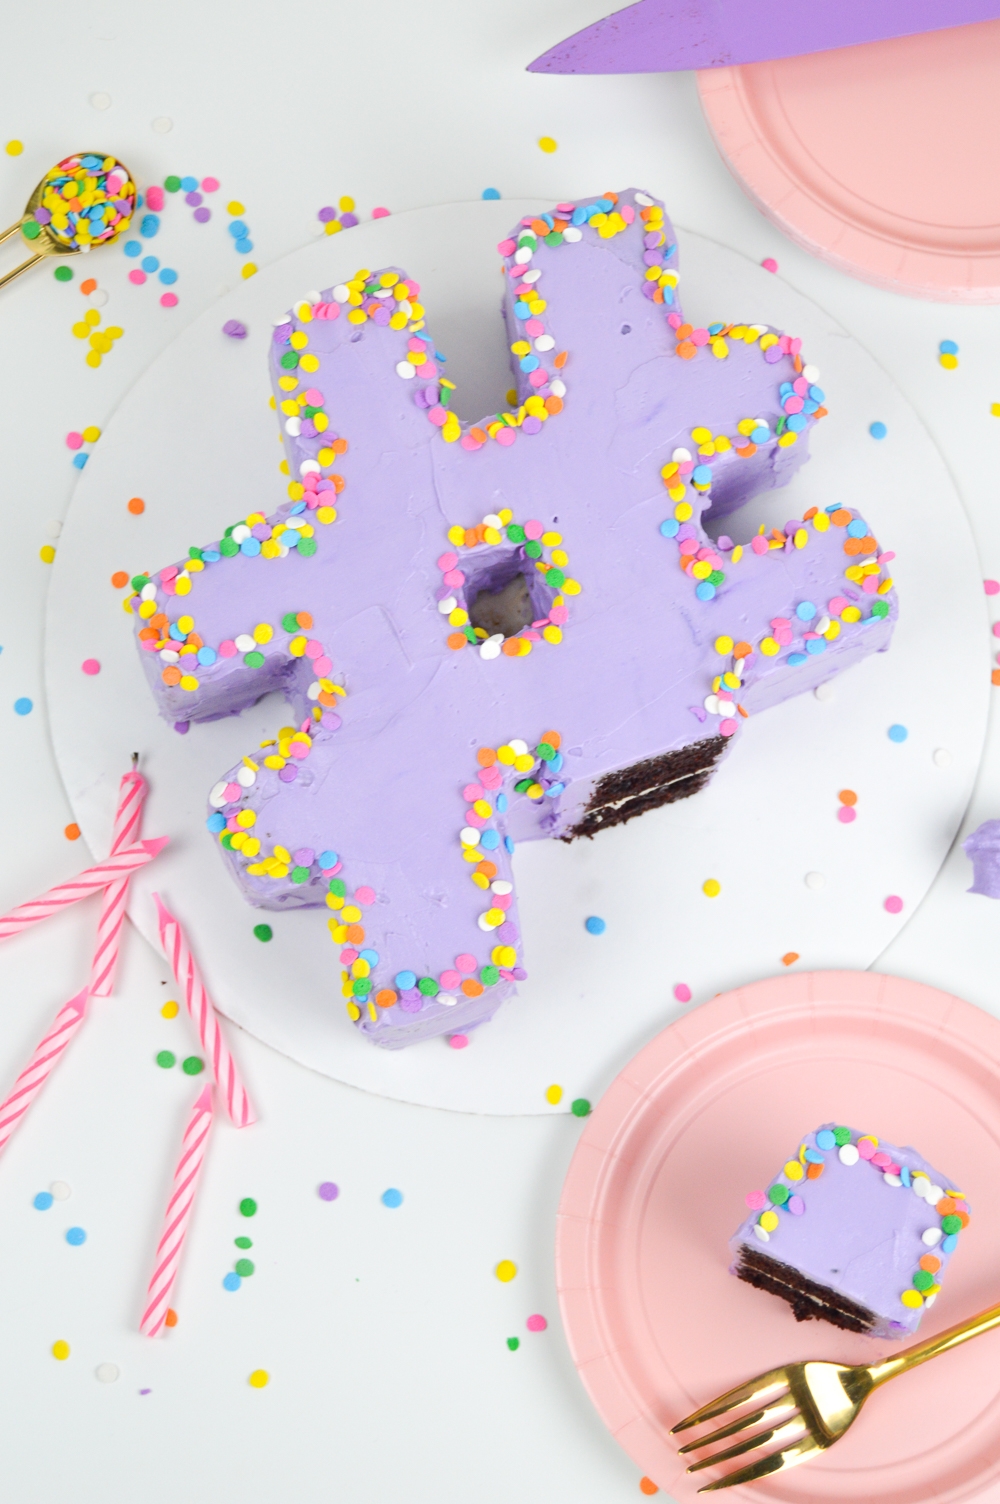
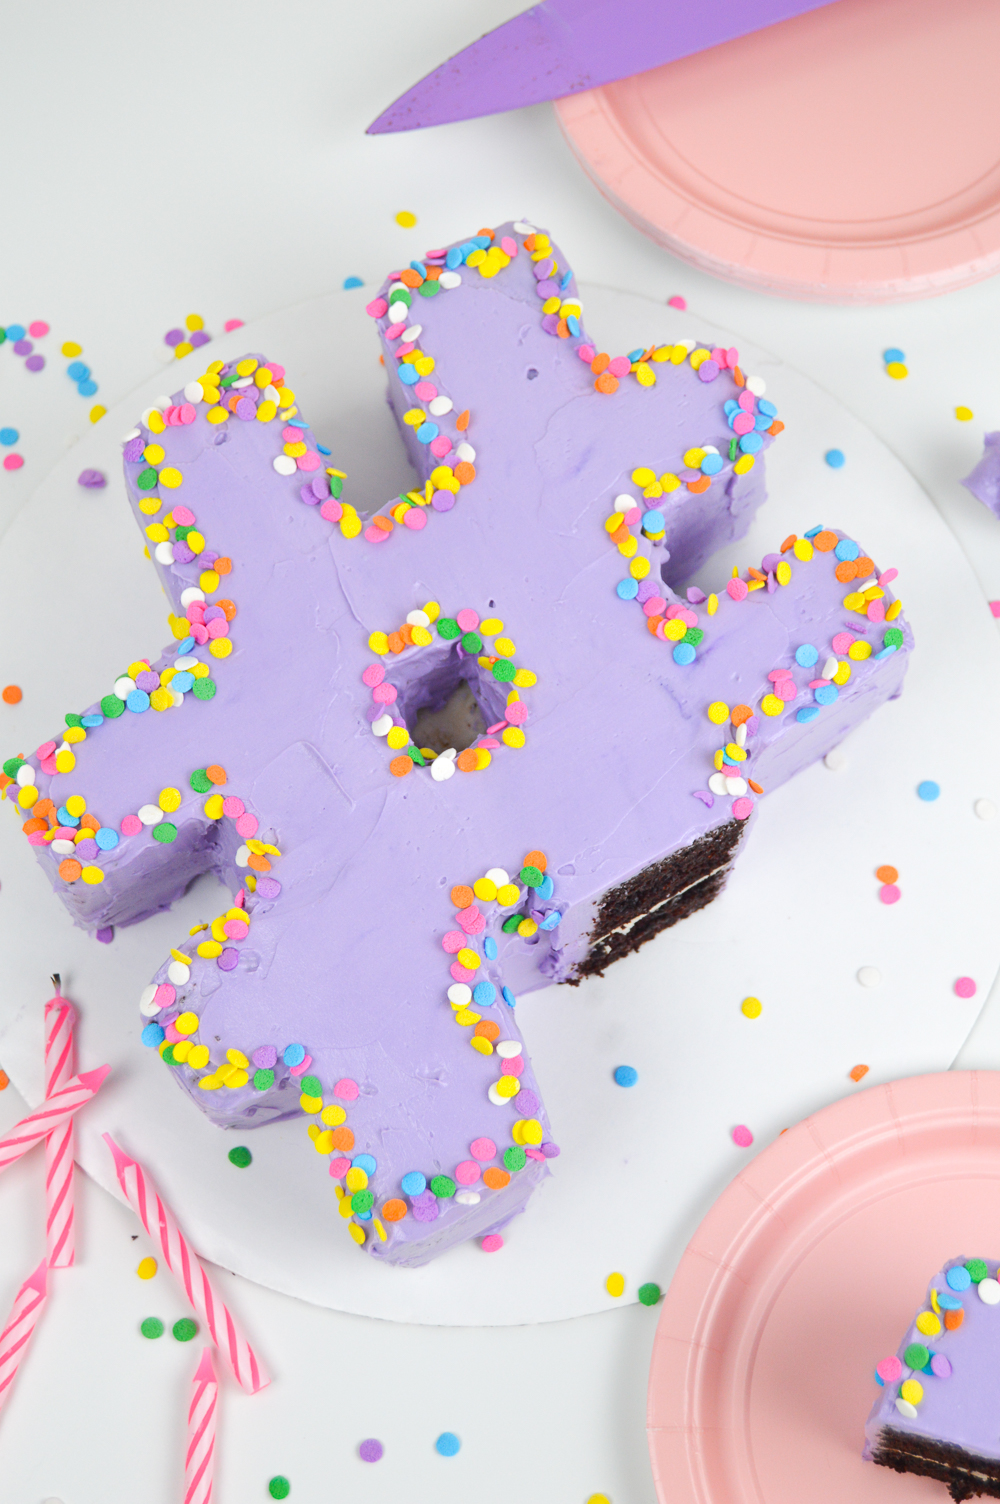
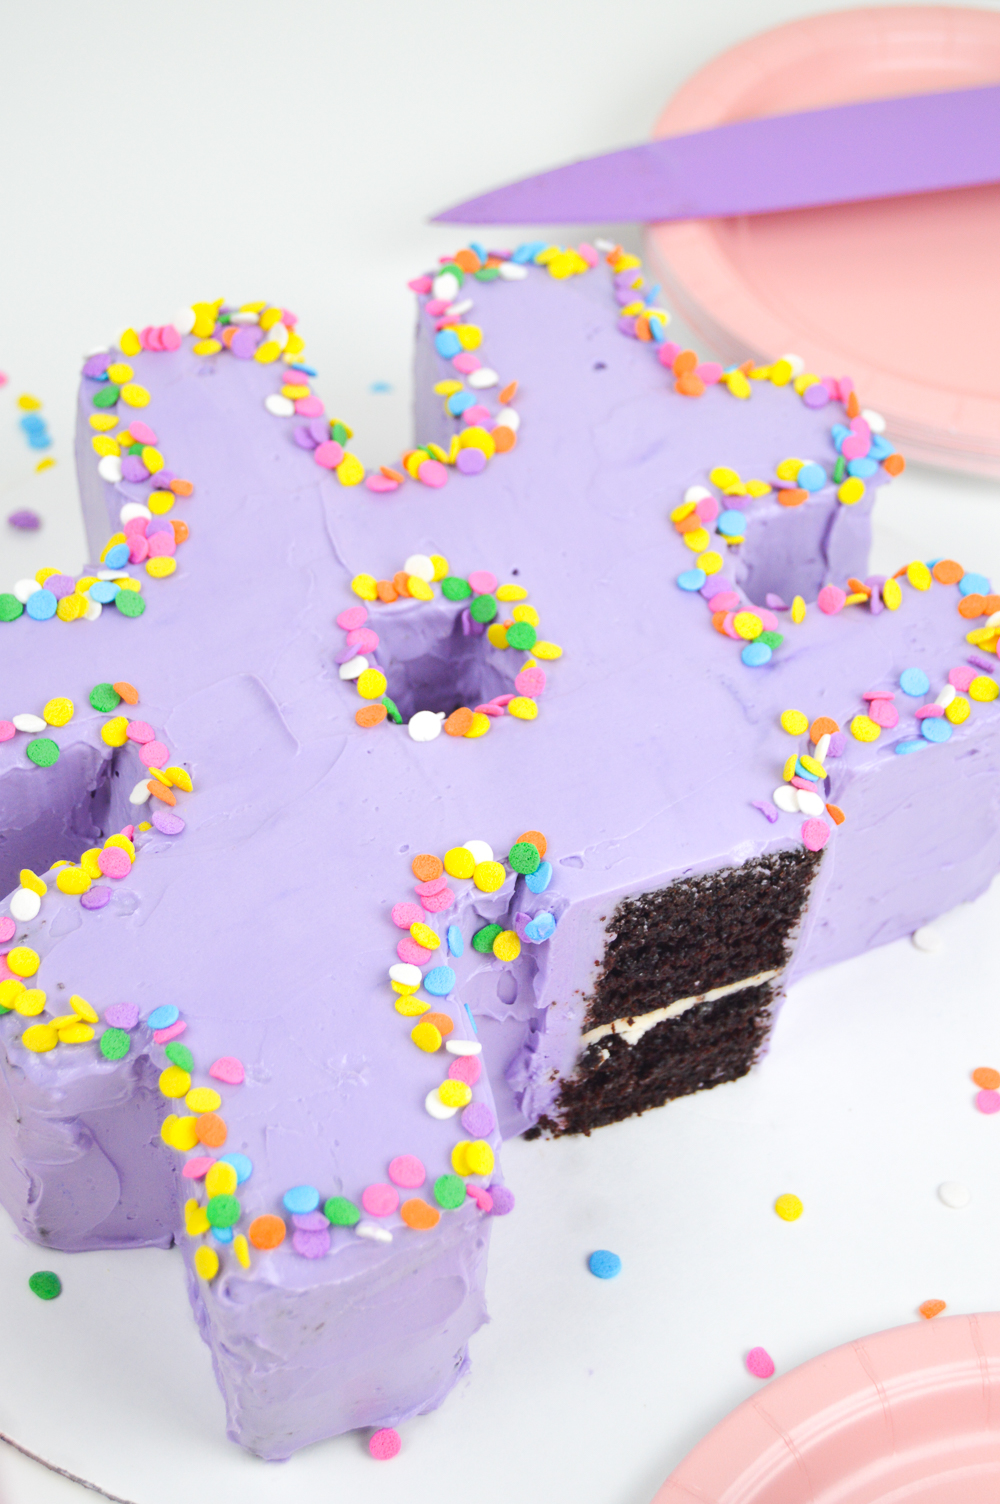
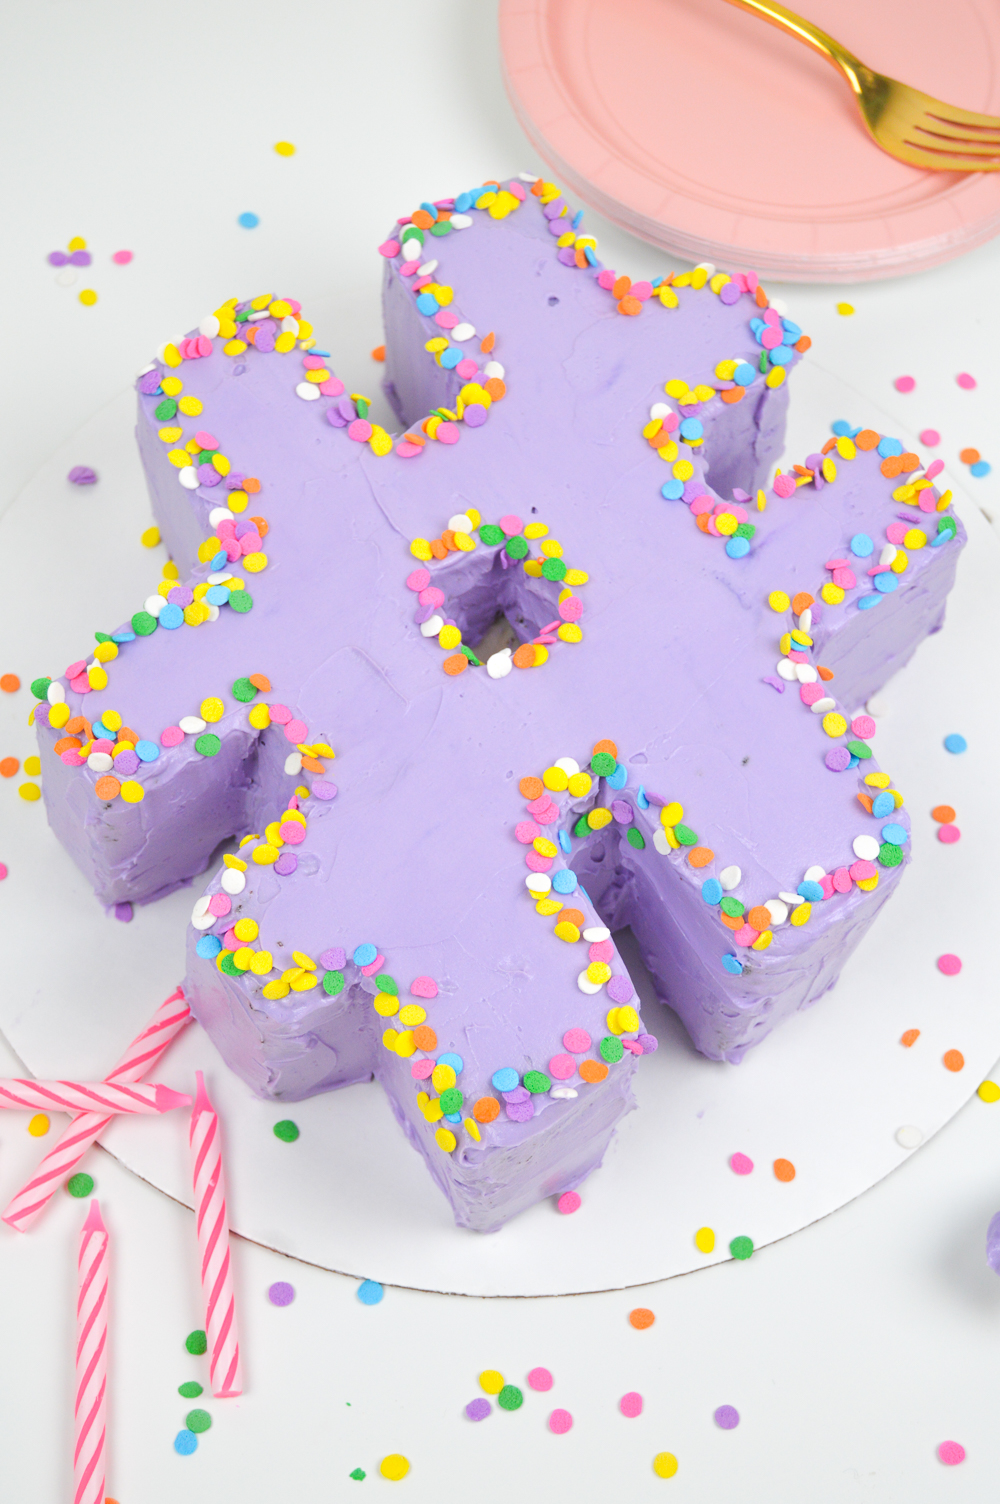
I’m not really sure I can pinpoint when hashtags took over the world, but I still remember the days where it was just a pound sign…then again, I thought hashtags were incredibly annoying when they first appeared and now I use them in every single Instagram post. A blogger’s gotta do what a blogger’s gotta do! To celebrate the all-powerful hashtag I used my FAVORITE chocolate cake recipe to make a 9-inch hashtag cake! #hashtag
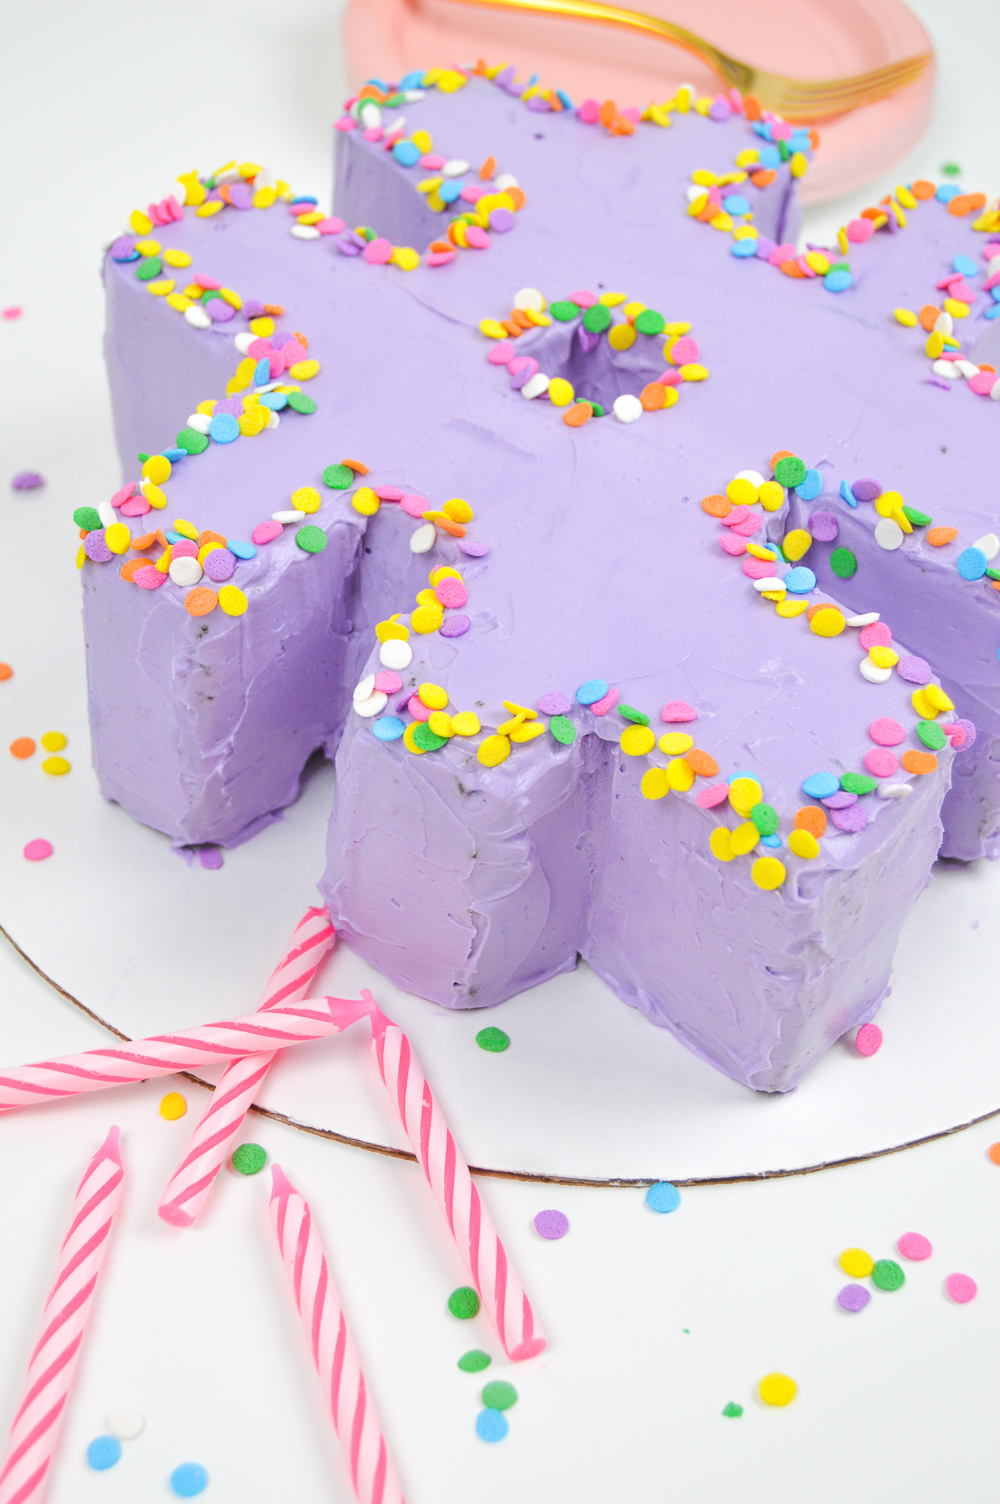
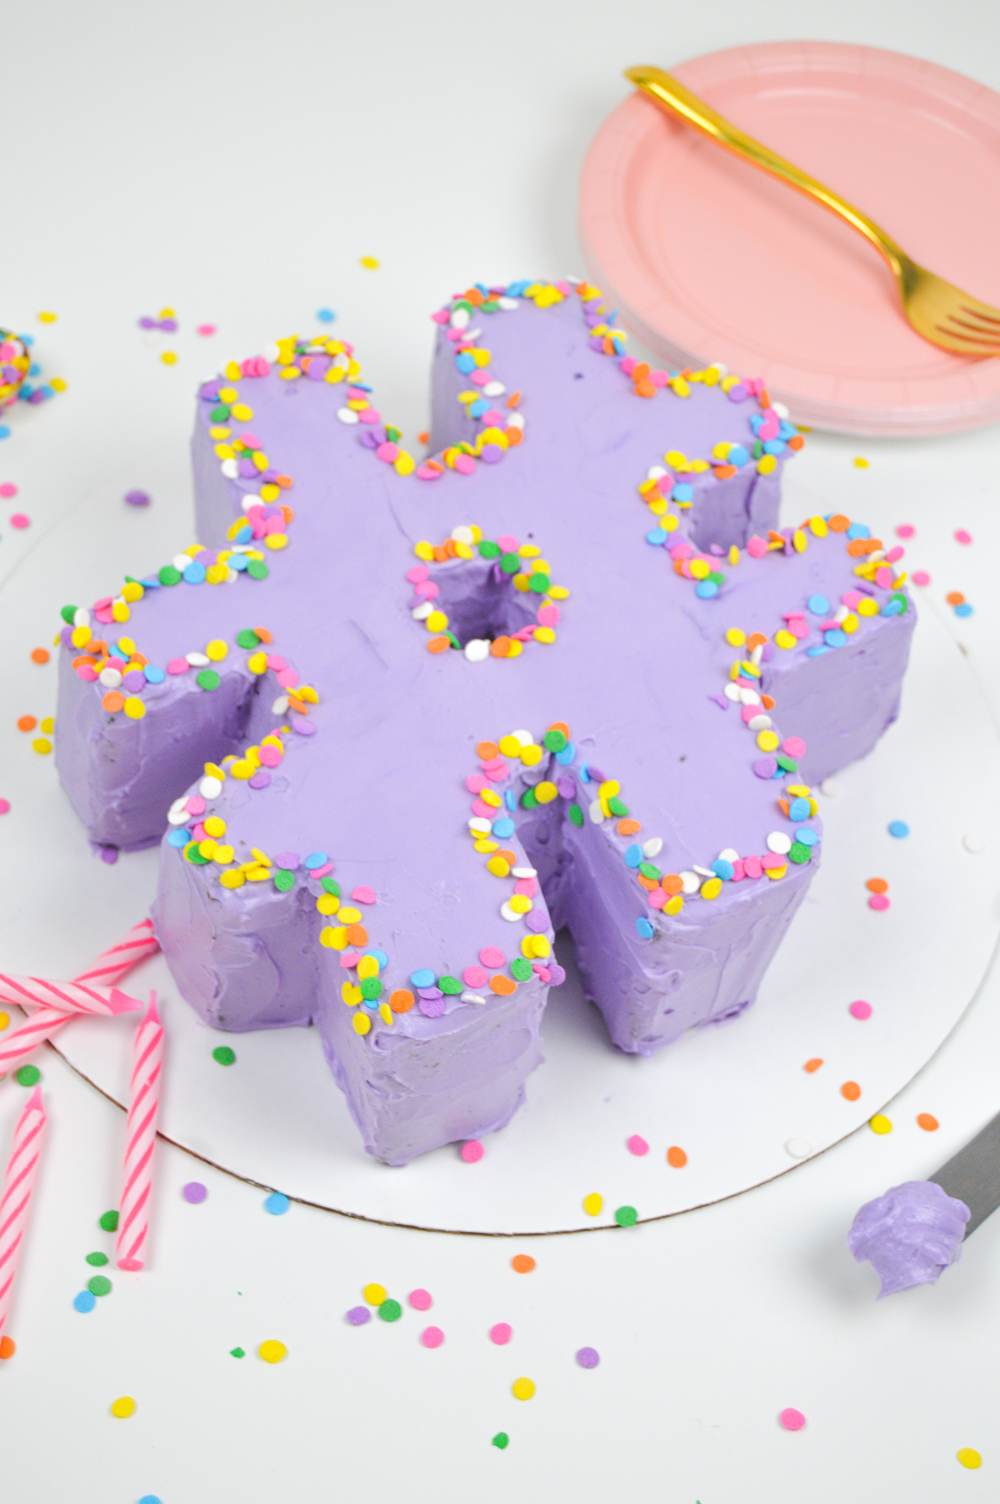
Yes, you read that right. In case you needed an excuse to have more hashtags in your life, this cake is it and it’s delicious. First of all, this is the only chocolate cake recipe you will ever need and this classic vanilla buttercream is the perfect topping for every cake. To put the finishing touches on this beauty, I colored the frosting purple and added some fun sprinkles around the edges because I figured a cake shaped like a hashtag sign needed a little extra glam. Obviously.
OK, now let’s eat this hashtag. (does that sound inappropriate to anyone else?)
Scroll down for the full recipe card for homemade chocolate cake (aka the best chocolate cake ever)! ??
How to Make a Hashtag Cake
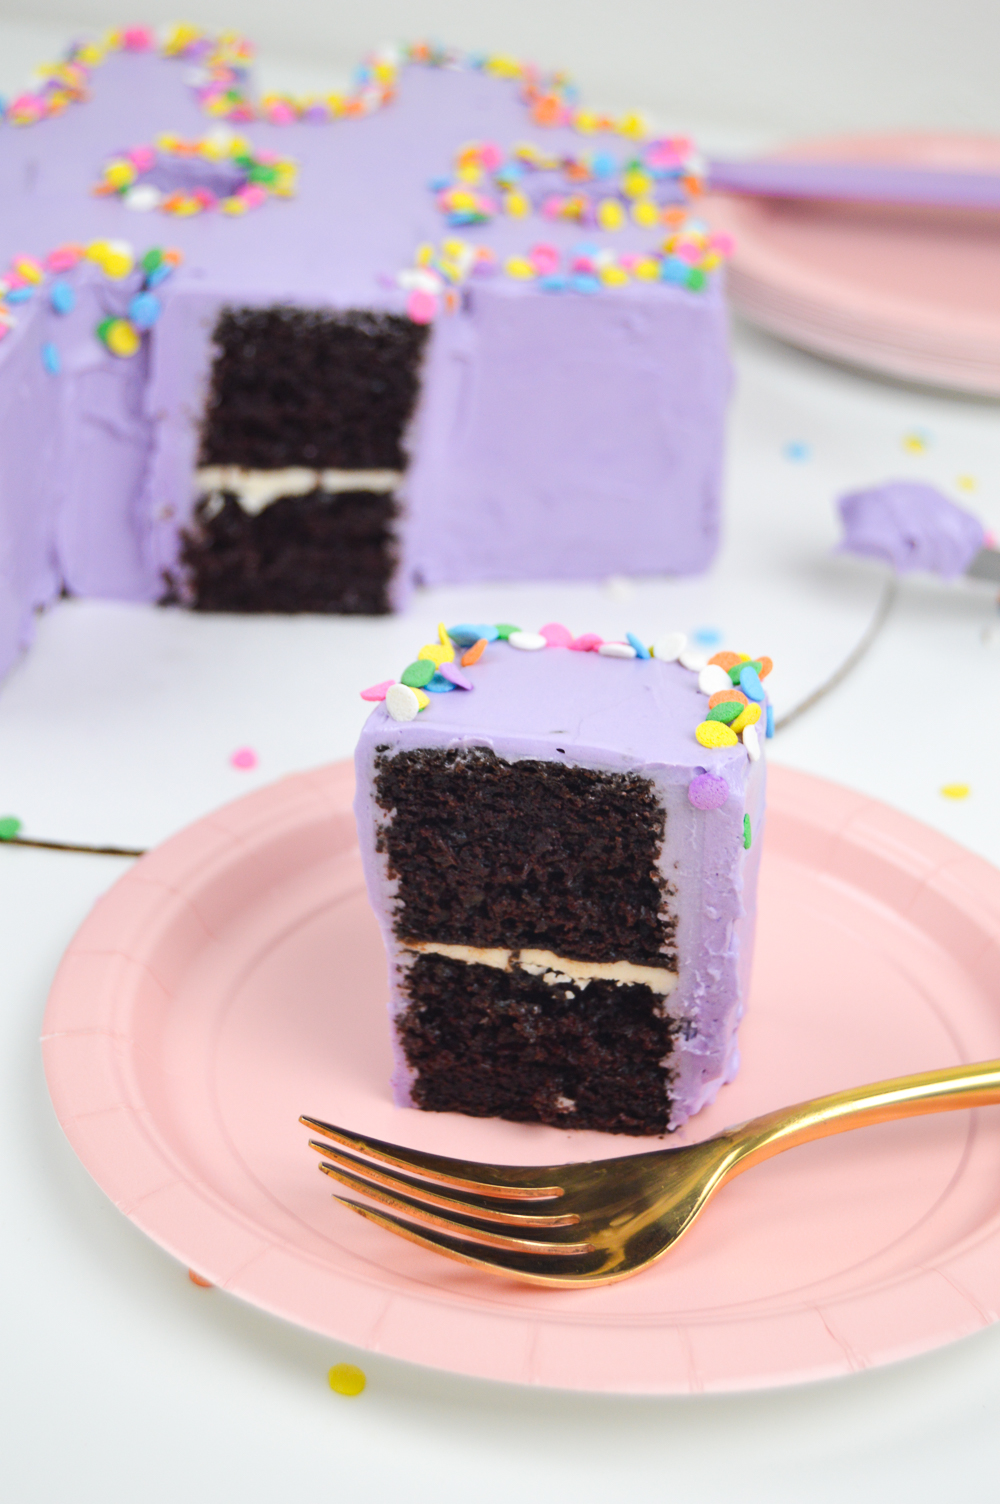
Use my to-die-for chocolate cake recipe below or use another of your favorites in two 9×9 inch cake pans! Also make one batch of my fluffy vanilla buttercream below or your other fav frosting. Let the cakes cool completely before removing from their pans and leveling the tops if needed (I like this recipe because it doesn’t dome as much).
Spread a little frosting on a cake board and carefully place your first layer on top. Fill with frosting and other filling (if desired) and place the second layer on top, preferably upside down to reduce crumbs and keep the top extra smooth.
Now comes the tough part – cutting the cake! In order to make this hashtag cake, I prepared a basic template to follow, which you can DOWNLOAD HERE to make it easier. Print it, cut out the white parts of the paper and lay it on top of your cake (it is created to fit a 9×9 inch cake). Use a knife to gently outline the edges to indicate where to cut the cake before cutting through both layers of cake with a sharp knife. Do not rush this part or you risk making mistakes or damaging the cake.
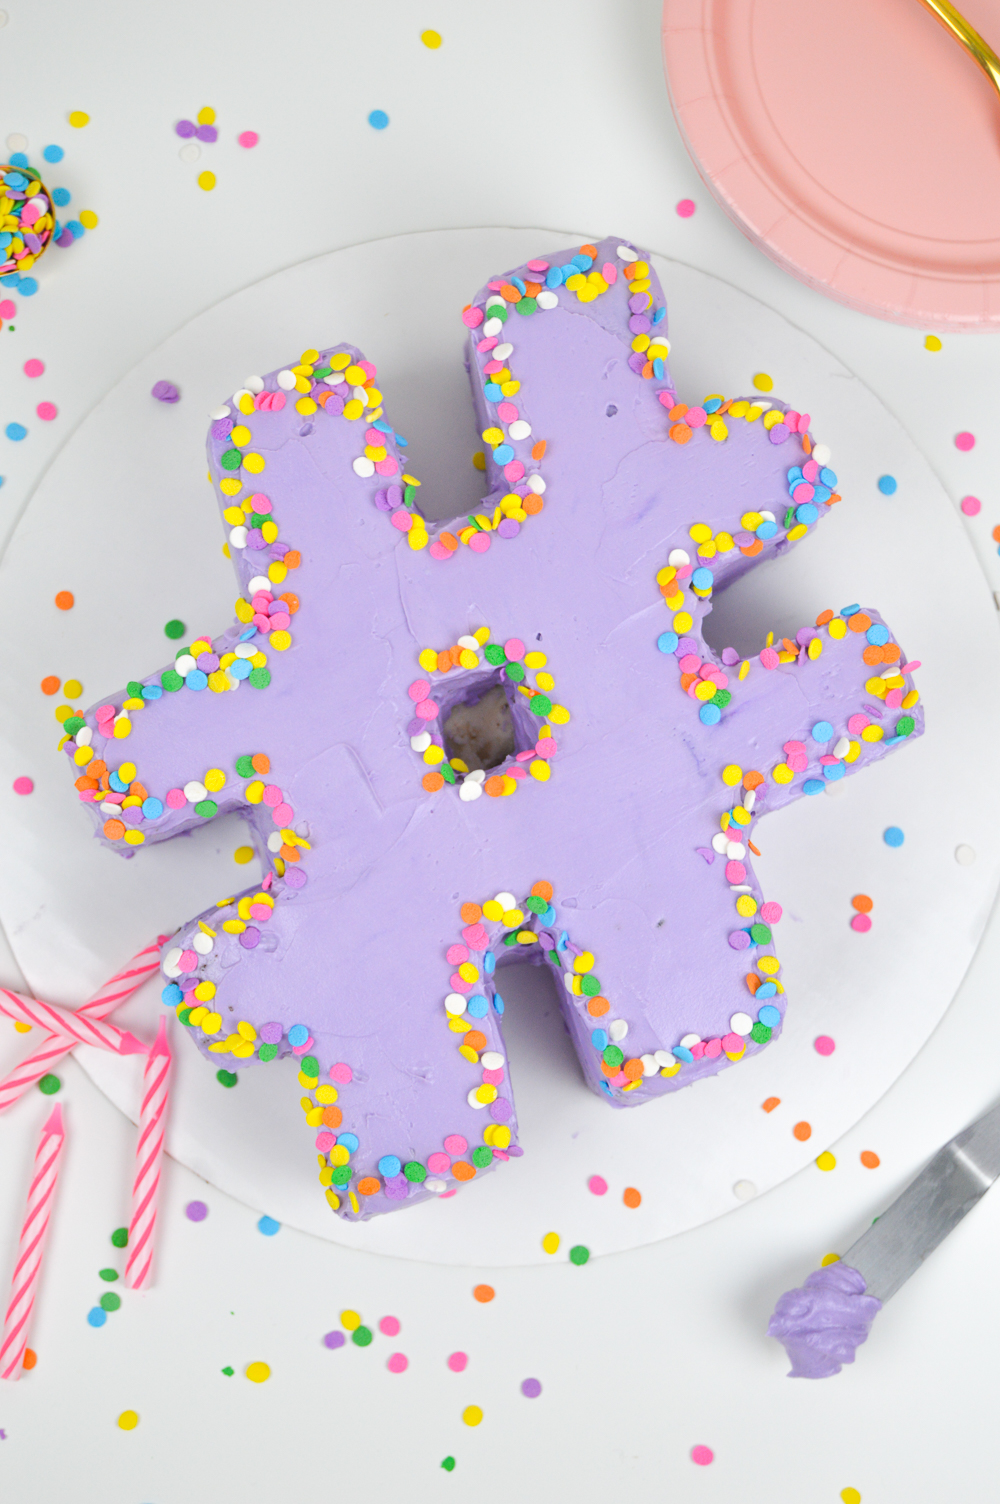
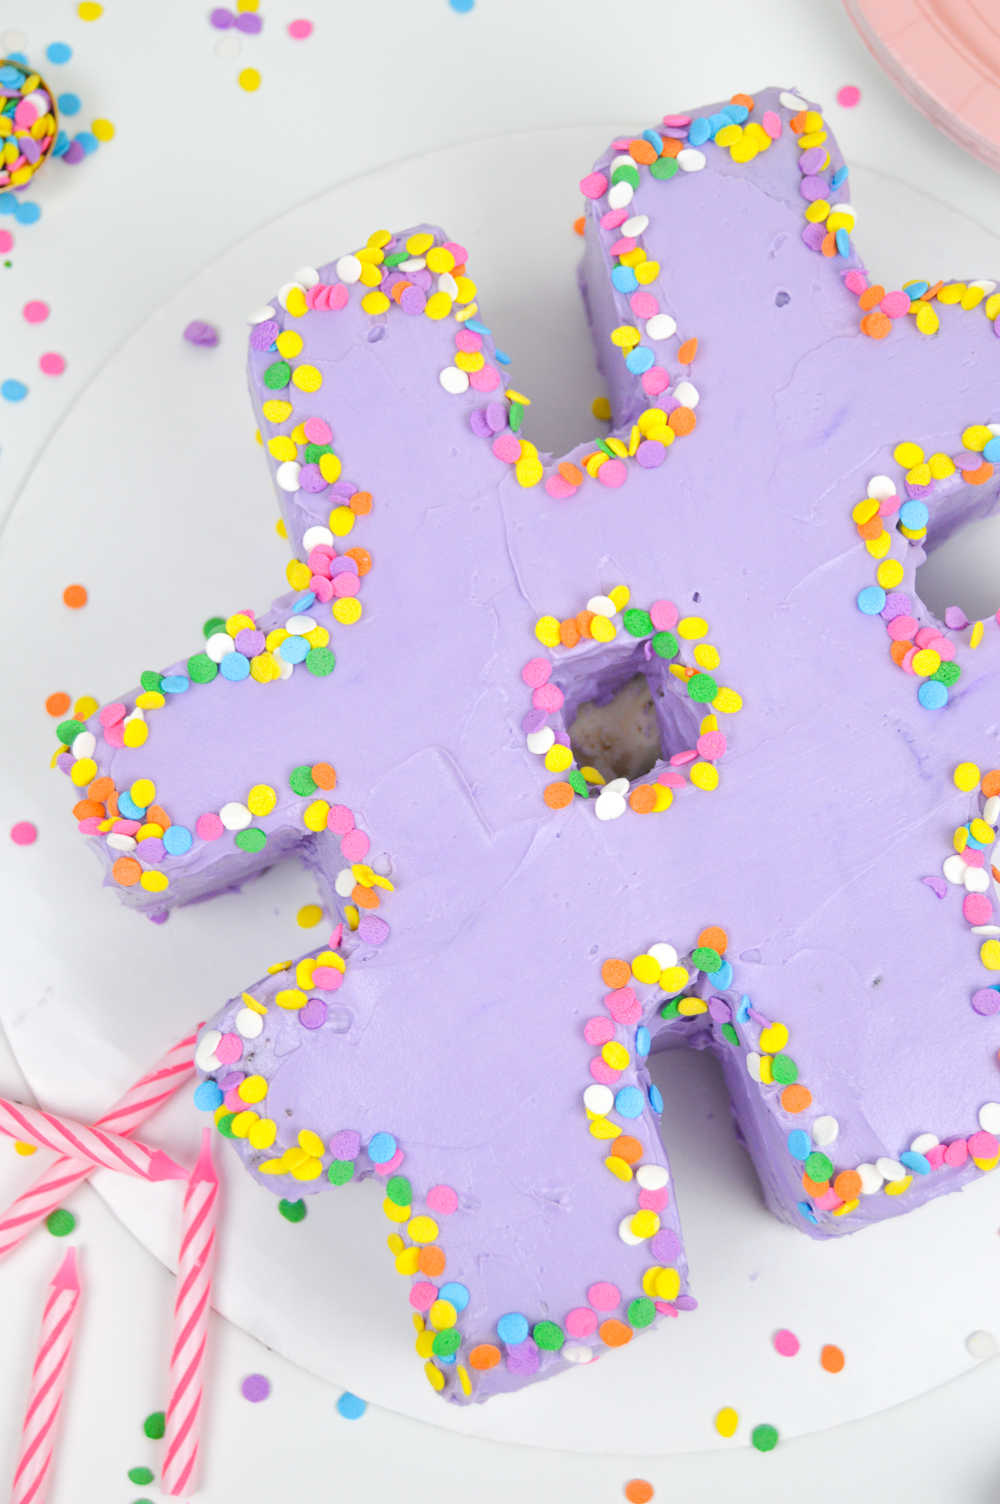
Once you’re satisfied, give the entire cake a crumb coat and move to the fridge to set. If desired, dye your frosting a fun color! I went with a light purple for the whole cake. Remove the cake from the fridge, and ice the cake with your prepared frosting, smoothing it out and filling in imperfections as needed (I recommend using an offset spatula). Next, you can decorate it by adding piping around the top or bottom or topping it with sprinkles!
It’s a little tough to cut and ice this shape but it turned out to be such a fun cake to make! I mean, how many people make a hashtag cake, you know?! Make it to celebrate pretty much any occasion just for fun and add your own little spin on the decorations.
PS – Stay tuned for Thursday’s post to see how to use your extra chocolate cake you cut away!

- 2 cups all-purpose flour
- 2 cups granulated sugar
- 1 cup unsweetened cocoa powder (I used Hershey’s)
- 1 1/2 tsp baking powder
- 2 tsp baking soda
- 1/2 tsp salt
- 3 eggs
- 1 cup buttermilk, room temperature
- 3/4 cup strong brewed coffee
- 1 cup vegetable oil
- 2 tsp vanilla extract
- 2 1/2 cups butter, room temperature
- 4 cups powdered sugar
- 1 tbsp vanilla extract
- Food dye (optional)
- Preheat oven to 350 degrees
- Spray two 9in square pans with cooking spray and line the bottoms with measured pieces of parchment
- In the bowl of your mixer fitted with a whisk attachment, combine the flour, sugar, cocoa powder, baking powder, baking soda and salt and mix to combine
- In a separate bowl, mix the coffee, buttermilk, vanilla and eggs with a whisk
- Slowly add the wet ingredients to the dry, mixing on low speed. Scrape the bowl, increase the speed to medium and mix until the batter is smooth
- Divide the batter between the greased pans and bake for about 22-25 minutes until a toothpick inserted into the middle comes out clean. Let cool completely before removing from pans
- Beat the softened butter with a paddle attachment for about 2 minutes until smooth and fluffy
- Add the powdered sugar in batches, scraping the bowl as you go
- Mix in the vanilla extract and desired food coloring
- Fill the cake
- Cut into the shape of a hashtag using a template
- Ice the cake with a crumb coat and refrigerate
- Once set, ice the cake with the colored frosting and decorate as desired
- See above for link to hashtag template