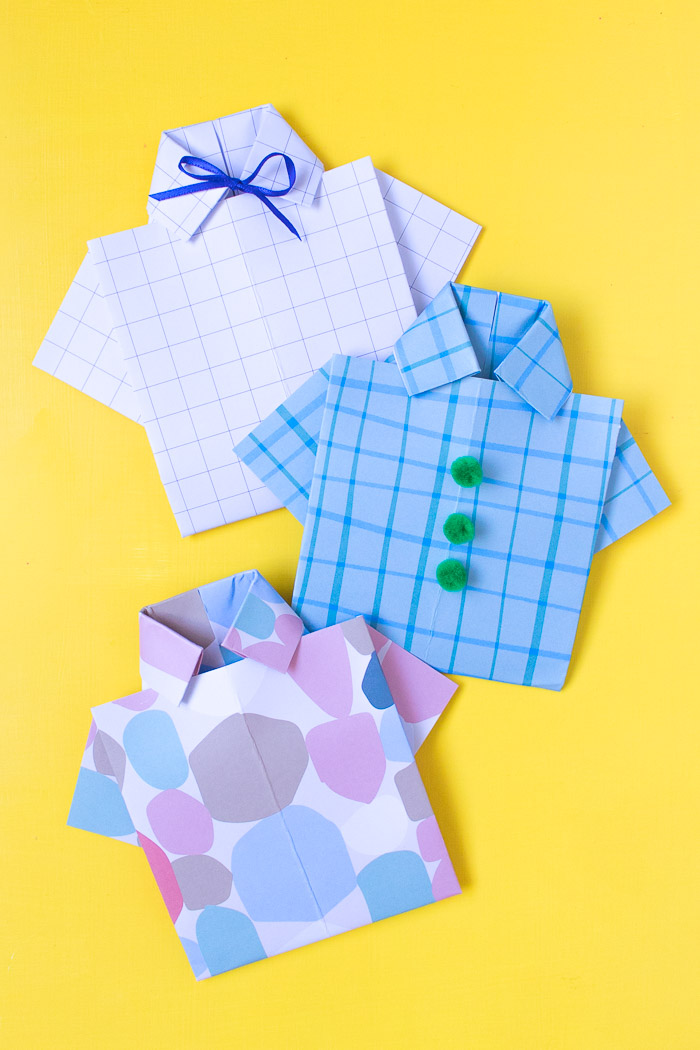
 Remember in school when teachers would have you make a Father’s Day gift and it was almost always something to do with tools or a tie? Well, when it came to ties, it never made sense to me because my dad didn’t wear ties or suits to work. Instead, his usual “dressing up” outfit consists of a Hawaiian shirt. Although I couldn’t find the perfect Hawaiian print paper for this project, I did find a few cute patterns to make an origami shirt card for Father’s Day, complete with embellishments so you can customize it for the dads in your life. Whether he’s a tie-wearing type or a plaid lover, you can choose patterns and fun add-ons that fit who he is. Then finish the card with a sweet message inside, or add a photo to make it even more personal! This origami Father’s Day card is simple to make with any sheet of paper, so you’ll have a completed card in just 5 minutes.
 I actually find this easy to do with patterned paper because the patterned side always faces out. Some origami doesn’t turn out this way, I’m thrilled that this one does! As far as origami goes, I’m happy to say this Father’s Day card is very easy. I’ve tried a few different origami projects that never seem this simple to me.
Of the three versions I made, I think the grid pattern with the bow is my favorite. It’s the closest I could get to a bow tie! What embellishments would you add to your origami shirt card?
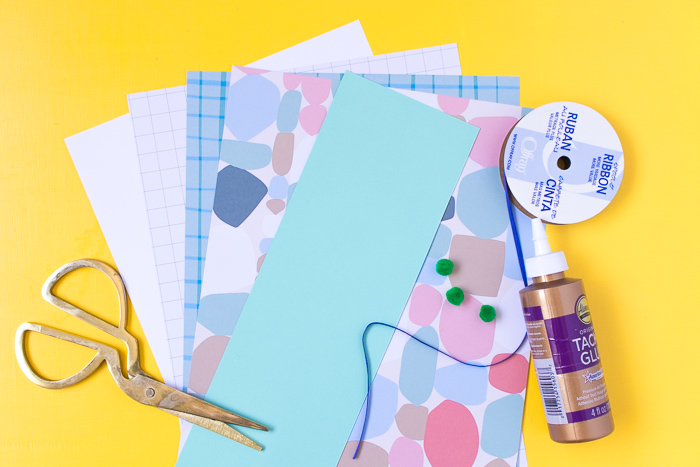
- Patterned cardstock (about 8.5 x 11 inches)
- Solid cardstock
- Scissors
- Glue
- Embellishments, optional
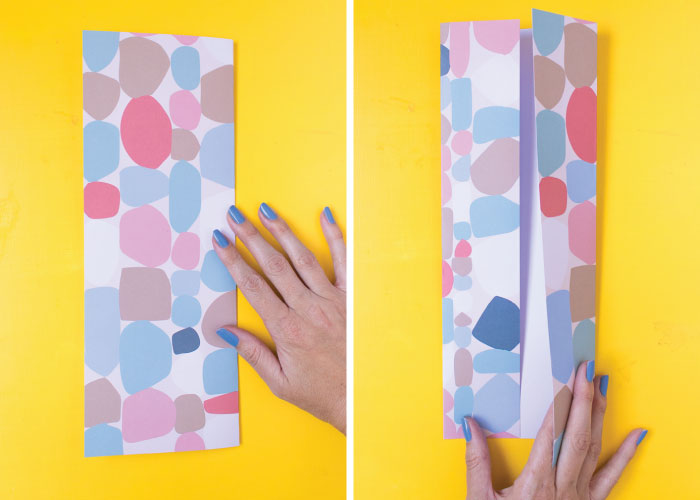 Step 1: Fold paper in half lengthwise with the patterned side facing out.
Step 2: Open up. Fold each side of the paper in to meet the middle fold.
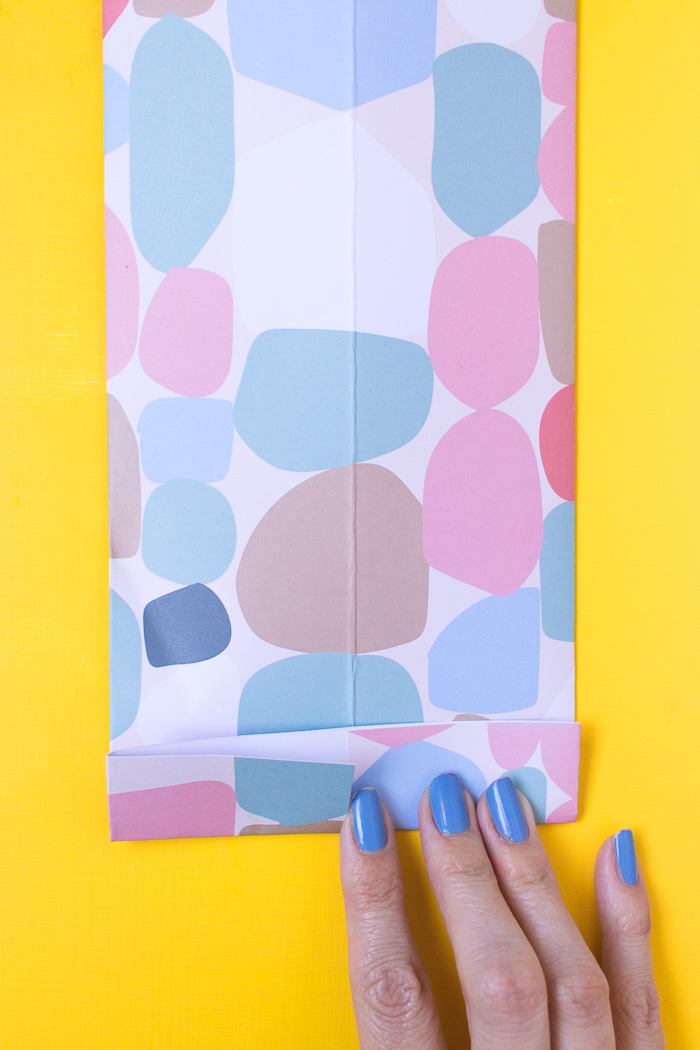 Step 3: Turn the paper over and fold up the bottom no more than 1 inch.
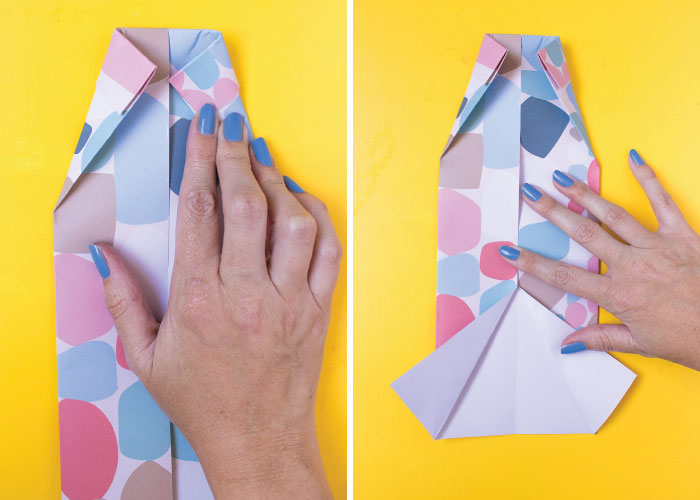 Step 4: Turn paper over again. At the end where you’ve folded over the paper, fold in the corners to meet the center, about 1 inch from the top. This will create the “collar” of the shirt.
Step 5: On the opposite end, fold out either side of the paper so that the white or solid side is showing. Both sides should mirror each other.
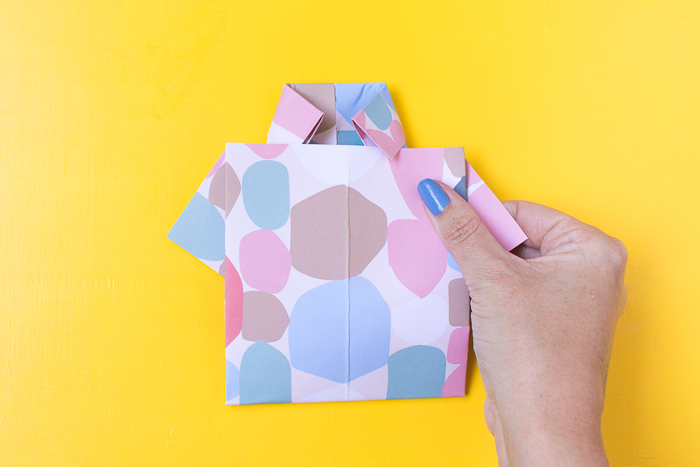 Step 6: Fold up the bottom and tuck under the folded collar to complete the origami shirt card.
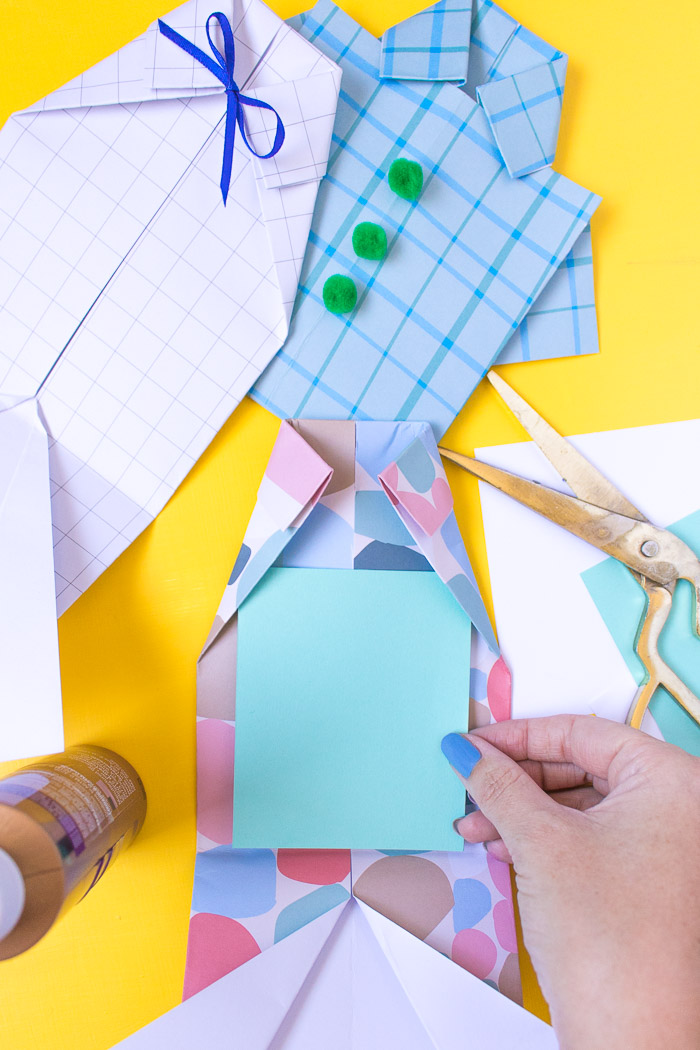 Step 7: Cut a small piece of solid cardstock about 2 x 3 inches or whatever size is needed to fit inside the card. Unfold the top and glue the the paper inside as the background for a message.
Write your message on the cardstock, or add a photo if you prefer!
 Step 8: Finish the card with decorations like pom pom buttons, a ribbon tie, stickers or paper designs. Make it unique to the dad in your life!
If only I could find an appropriate Hawaiian patterned paper for my own dad! Happy Father’s Day to all the dads out there!
Please note this post contains affiliate links from which I may collect a small profit should you choose to make a purchase. I only link to products I personally use or recommend.

Jodie
Hi Holly. This is a super cute card for Father’s Day and so easy to do! Thanks for sharing your tutorial. We’ve included it in our latest Top 10 In Craft roundup. https://craftylikegranny.com/take-life-one-stitch-at-a-time/ Cheers Jodie 🙂
Holly Wade
JodieThanks for sharing, Jodie!!