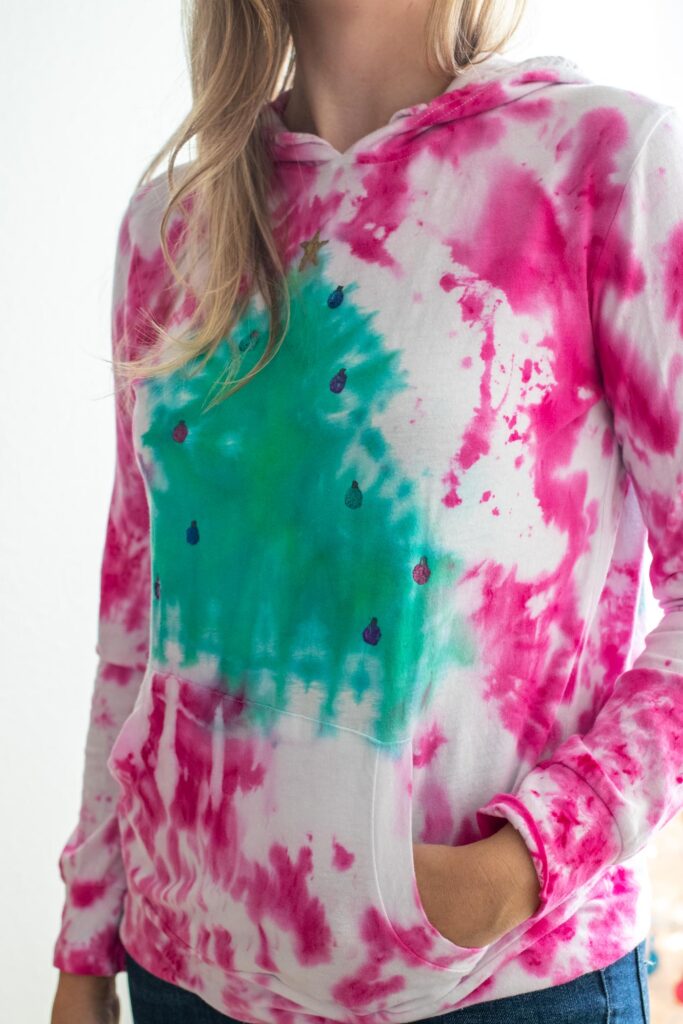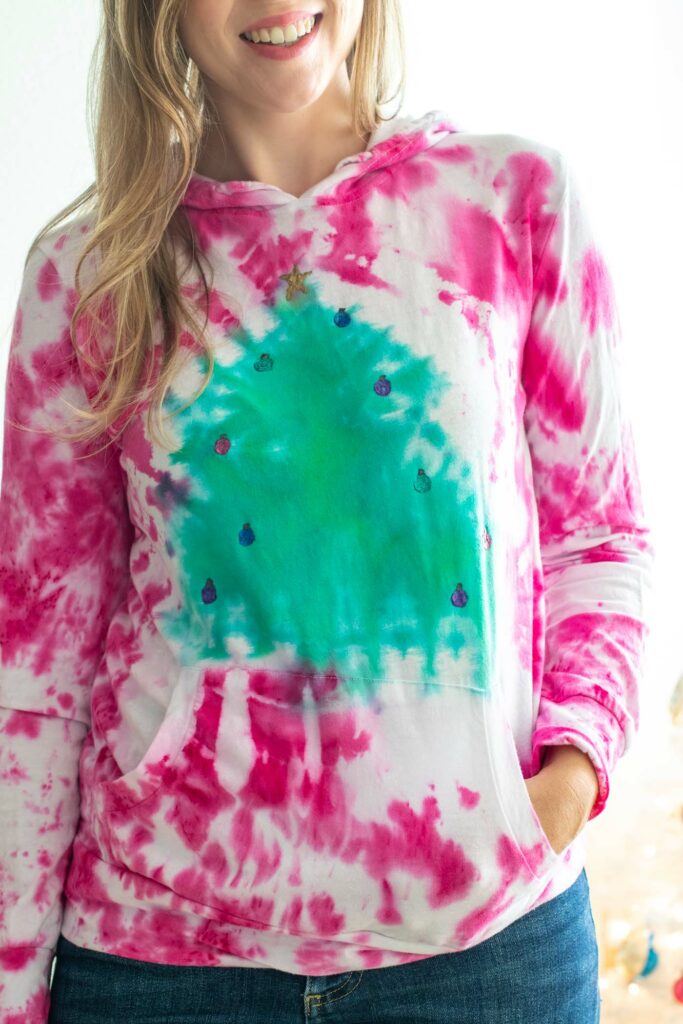
The following tie dye Christmas tree sweater tutorial is sponsored by Tulip

Goodbye Halloween, and hello Christmas! Don’t worry, I won’t completely skip over Thanksgiving! I just couldn’t wait to share this tutorial using Tulip’s new 2-Minute Tie Dye kits that eliminate hours of wait time for the dye to sink into your fabric. To experiment, I made this tie dye Christmas tree sweater decorated with painted ornaments. Now that the weather is (finally) cooling down, a lightweight sweatshirt is a comfy and cozy addition to your wardrobe. Creating this Christmas tree design with tie dye is not very difficult, and you’ll see exactly how to recreate it in this short video.

Let’s start with a few notes about supplies. First, make sure you purchase a 100% cotton sweatshirt with a lightweight material. In order for the tie dye to seep through the fabric properly, you need something lightweight. Of course, you can also try making this tie dye Christmas tree design on a traditional t-shirt! Be sure to use washable marker to trace your design so that it does not leave marker lines behind. Now, let’s tie dye!
Supplies:
- Tulip 2-Minute Tie Dye kit
- Thin white sweatshirt (100% cotton)
- Washable marker
- Paper
- Plastic, for covering workspace
- Tulip Dimensional Glitter Paint
- Tulip Dimensional Metallic Paint
How to Create Shapes with Tie Dye
Step 1: Pre-wash the sweatshirt and dry. Then lay flat and fold lengthwise down the middle.
Step 2: Cut out a Christmas tree shape from paper. Then cut or fold in half.
Step 3: Place the paper tree shape at the fold of the sweatshirt. Trace it with a washable marker. I recommend using a color that coordinates with your tie dye Christmas tree colors, such as green.
Step 4: Open the 2-Minute Tie Dye kit and remove the rubber bands. Pinch and accordion fold the fabric at the marker lines. Move the sweatshirt around as needed to pinch the fabric together while keeping the marker lines as lined up as possible. If not, you will not create the proper tree shape.
Step 5: Then rubber band at the marker line. Add additional rubber bands below it in your desired technique. In this case, I scrunched the fabric before rubber banding it together.
Step 6: Mix your dyes. Choose your colors and add water to the bottles’ fill line. Shake vigorously.
Step 7: Soak the sweatshirt in water for several minutes, then squeeze out water. The sweatshirt must be damp all the way through.
Note, the marker may begin to spread or wash away and that’s fine. It will wash away completely later.
Step 8: Cover your work surface with plastic to protect it. Carefully apply green dye to the end where you traced the tie dye Christmas tree pattern. It’s OK if it goes slightly beyond the rubber banded marker lines.
Step 9: Use pink dye or other colors to tie dye the remainder of the sweatshirt as desired. I chose to leave a lot of white space throughout.
Step 10: Follow the 2-Minute Tie Dye package instructions for the next steps. Once your dying is complete, carefully place the banded fabric into the provided container and snap closed. For best results, DO NOT let the green section touch the rest of the fabric.
Step 11: Microwave for about 2 minutes (check package instructions for specifics). Then let sit with the container closed for 15 minutes before opening. It will be very warm.
Step 12: Remove the rubber bands to reveal your design. Let dry completely before washing and drying as usual.
Step 13: Finish the tie dye Christmas tree sweatshirt with glittery ornaments and a metallic tree topper using Tulip Dimensional Paints. Let dry completely before wearing.

How fun would this tie dye Christmas tree sweatshirt be for your next holiday party?!
Thank you to Tulip for generously sponsoring this post. All opinions are my own. Thanks for supporting the brands that keep Club Crafted crafting!
